


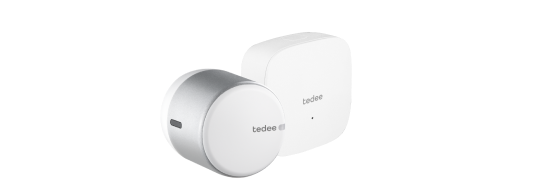


Tedee Keypad PRO Flush Wall Mount
User guide and installation manual
| This manual is intended for professional users only and requires the use of a dedicated Tedee Keypad PRO Flush Wall Mount, sold separately from the device.Contact [email protected] to order. |
Introduction
The Tedee Keypad PRO is compatible with a dedicated flush wall mount, enabling seamless wall installation for a smooth design and premium finish.
With a wired power connection concealed inside the wall, the flush wall mount offers a safe and elegant way to hide and protect electronic components, achieving a sleek, minimal look while reducing maintenance needs.
More information on the Tedee Keypad PRO is available here >>

Installation Method
The flush wall box is installed in a wall cavity with specified dimensions, where a 5–24V DC, 0.5A wired input is prepared. The power adapter cable is connected to the power supply and inserted through a slot in the flush wall box.
The wall box is then fixed to the wall. The device is connected to the power adapter cable and installed in the wall box using a magnetic mounting plate.

Set Contents
Flush Wall Mount set includes:

- Wall box
- Magnetic mounting plate
- 4 x Mounting screws
- Removal pin
Flush wall box installation uses components from the Tedee Keypad PRO box:

- Power port seal
- Battery cover
- Tedee Keypad PRO body
- Power adapter cable
- 4 x AAA batteries
Power Supply
When installed with a flush wall mount, the Tedee Keypad PRO can be powered by replaceable batteries and/or a wired power connection.
Even when using a wired power supply, it is recommended to insert batteries into the Tedee Keypad PRO to ensure operation during power outages or failures. The device prioritises wired power, using battery power only when needed.
When using batteries with your wired power input, remember to replace batteries every two years, no matter their power level, in order to prevent battery leakage.
| IMPORTANTBefore using your new Keypad PRO, please read the accompanying safety information booklet carefully.
Your safety is our top priority, and the booklet contains important information to ensure smooth and safe operation. |
Water Resistance
The Tedee Keypad PRO is rain-resistant and suitable for outdoor installation. However, it is not intended for locations with prolonged, direct, and unobstructed exposure to water.
Be aware that the flush wall mount for Tedee Keypad PRO does not provide water protection. Tedee is not responsible for any damage or malfunction resulting from the use of the flush wall mount in outdoor installations, including exposure to water.
Installation
|
WARNING NEVER plug the device directly into an electrical outlet or a 230V/110V power supply. Doing so poses a high risk of electrocution, fire, and serious injury. DO NOT touch electrical outputs without proper insulation (e.g., rubber gloves). Even when the device is switched off, outputs may still carry current. ALWAYS disconnect the power circuit before performing installation work. |
Cavity Dimensions
The wall box can be installed in two ways:
- Shallow mount – the aluminium frame overlays the wall, covering the edge of the cavity.
- Deep mount on wall panels – the entire box is recessed into the wall, with the aluminium frame flush with the wall surface. Requires more advanced, double level cavity and precise preparation.
Decide on your preferred installation method before determining the required cavity dimensions.

Before preparing the cavity using your preferred method, review the precise box dimensions in the drawing below. Allow sufficient extra space and clearance to accommodate the cable connection and achieve the desired finish.

After preparing the cavity, use the wall box as a template to mark the drilling positions, or follow the hole placement measurements shown in the drawing.

Drill four holes and insert wall plugs.


Wired Adapter Connection
Remove the seal from the Tedee Keypad PRO to reveal the power port.

Thread the power adapter cable included with the Tedee Keypad PRO through the seal. Ensure the cable end with the port is behind the flat part of the seal.

Connect the power adapter cable to the wall’s wired output:
Connect the positive wire (+) to the red Tedee Keypad PRO wire.
Connect the negative wire (-) to the black Tedee Keypad PRO wire.
Ensure proper insulation against both electricity and moisture.
Wall Box Installation
Feed the power cable through the slot in the wall box.
Insert the wall box into the cavity and secure it with four screws.

Battery Installation
If using batteries with your Tedee Keypad PRO:

Slide down and lift the mounting plate on the back of the device.
Remove the battery plug from the base of the device.
Insert 4 × AAA batteries, ensuring the correct “+” and “–” orientation, as shown in the illustration or engraved guides.
Reinsert the battery plug until it clicks securely into place.
The device will turn on automatically, indicated by the LED blinking red, blue, green, and white.
Do not replace the default mounting plate.
Magnetic Mounting Plate Installation
If not already done, remove the default mounting plate from the Keypad PRO by pressing it downwards and lifting it off.

Install the magnetic mounting plate onto the Keypad PRO using four mounting screws.

Keypad PRO Connection
Plug the power connector into the port in the Tedee Keypad PRO.

With a cable port inserted, secure the seal around the port.

Keypad PRO Installation
With the magnetic mounting plate installed on the device and the wall box fixed (with the cable connected), place the Keypad PRO into the box. It will attach magnetically.
When installing a cable-connected device, ensure the wire is not placed beneath the magnetic mounting plate.
Hide excess cable underneath the wall box or in its deeper upper section.

Turn the power circuit back on and activate the device in the Tedee app.
Keypad PRO Removal
To remove the device from the wall box, first disable the wired power circuit.

Insert the removal pin, with the angled end positioned horizontally, into the slot on the bottom edge of the Keypad PRO. When inserted, rotate the tool so that the angled end hooks behind the device. Gently pull the pin to detach the Keypad PRO from the magnetic mount.


