Tedee Dry Contact
Installation manual
Introduction
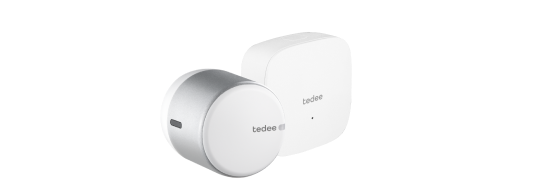
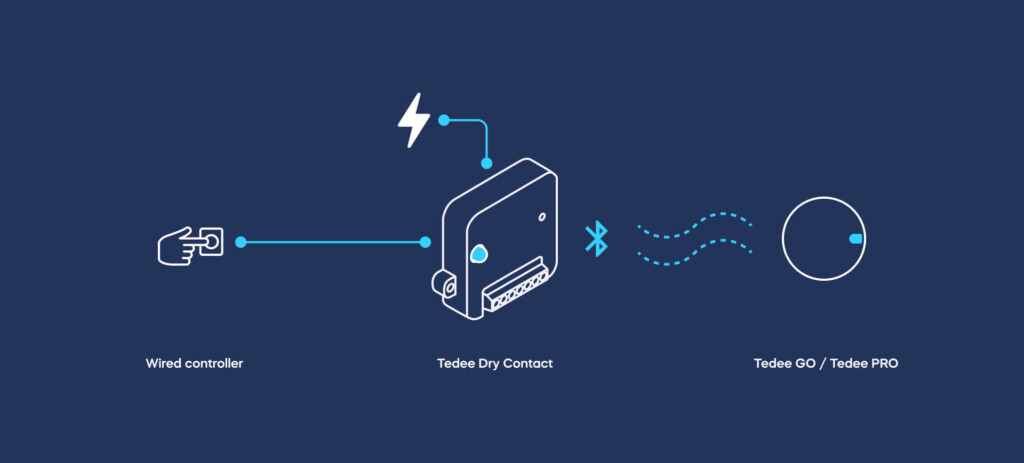
Tedee Dry Contact is a matchbox-sized unit that connects to Tedee GO and Tedee PRO smart locks using Bluetooth. It can be wired directly into existing dry contact systems through connections for power and control signals.
Tedee Dry Contact is designed to expand the functionality of Tedee smart locks by enabling:
- Direct connections to alarm systems.
- Local integration with compatible smart home systems.
- Use with automatic door openers and in critical infrastructure installations.
- Operation via simple manual controls like buttons and switches.
- Other functionalities as needed.
Application Example
Suppose you want to unlock a Tedee GO smart lock by pressing a dedicated physical button at the reception desk to allow visitors inside the property without using the Tedee app on a smartphone.
You can connect the Tedee Dry Contact to a battery-powered, compatible wired switch and pair it with the smart lock.
When pressed, this button triggers the Tedee Dry Contact to wirelessly unlock the smart lock via Bluetooth, eliminating the need for apps or an online cloud connection.
Installation Requirements and Safety Considerations
Please read the information below carefully to ensure your safety during the installation process of the Tedee Dry Contact.
The installation of the Tedee Dry Contact is intended for professional setup to ensure safety and compliance with electrical standards.
Tedee Dry Contact must be permanently installed at a location where it can simultaneously connect to the Tedee PRO or the Tedee GO smart locks via Bluetooth, and must be wired to a power source and dry contact controller.
Security
Controlling a Tedee smart lock via Tedee Dry Contact replaces the typical Tedee cloud security system and digital authentication with an alternative, wired access method.
Tedee is not responsible for the physical security of the installation or for protecting your devices against unauthorized access. Like any alarm controller or access management system, its location, administration, and users should be protected, verified, and regularly monitored.
Smart Lock Compatibility
To pair or unpair the Tedee Dry Contact with the Tedee PRO or the Tedee GO, the user must have an owner or administrator access level over the smart lock.
One Tedee Dry Contact controls only one Tedee smart lock.
Bluetooth Considerations
Typically, the Bluetooth range allowing for the operation of a smart lock extends up to 10 meters (approximately 30 feet) around the Tedee PRO / Tedee GO. However, the specific setup and location features may require a closer installation.
Be aware that Bluetooth range is highly susceptible to physical barriers; open spaces allow for a longer connection distance, while walls, doors, or metal structures and installations may significantly reduce this range.
The best method to determine the available location range is to test it by unlocking a smart lock with the Tedee app via Bluetooth at the intended location. If the connection is efficient, that location is suitable for permanent Tedee Dry Contact installation.
Power Supply
Tedee Dry Contact uses a power input of 6-60V DC voltage, offering compatibility with a wide range of power sources from power banks to permanent electrical connections.
Ensure that a power source is available at the intended installation location for the device, where it can connect efficiently to your smart lock via Bluetooth.
Tedee Dry Contact does not include a power adapter.
Never connect Tedee Dry Contact directly to a power outlet or a 230V/110V power supply.
WarningConnect the device only according to the diagram presented in this manual. Improper connections can be dangerous, may damage the device, and could void your warranty. Danger! Risk of electric shock!Even when the device is turned off, the outputs may still be live (actively transmitting electricity). All installation work should ALWAYS be performed with the power circuit disconnected. NoteConnecting the device to a power supply that does not meet the specifications outlined in EN 50081-1, EN 50082-1, UL508, and EN 60950 may void the warranty. |
Safety Precautions
Disconnect the installation supply voltage before installing the Tedee Dry Contact device.
Switch off the main fuse or disconnect the power cord from the main socket.
Installation Location
Install the module in a place protected against adverse environmental conditions and unauthorized access, such as in a flush box or inside the enclosure of the controlled device.
Device Placement and Installation
Be aware that metallic elements (wires, housing parts) may negatively influence the wireless connection and operation of the device.
It is recommended to fix the module in a stable position. The device body has two holes suitable for secure installation using screws (not included).
Step 1) Connection Guidelines
The device uses two logical inputs to trigger locking and unlocking operations. These can be wired to any compatible outputs, such as alarm controllers, buttons, switches, or relays.
Two outputs convey the lock’s status, indicating whether it is locked or unlocked and whether the device requires attention, for example, when it is blocked, needs charging, or requires calibration.
The operation of Tedee Dry Contact’s inputs and outputs can be configured within the Tedee app.
Wiring Guide
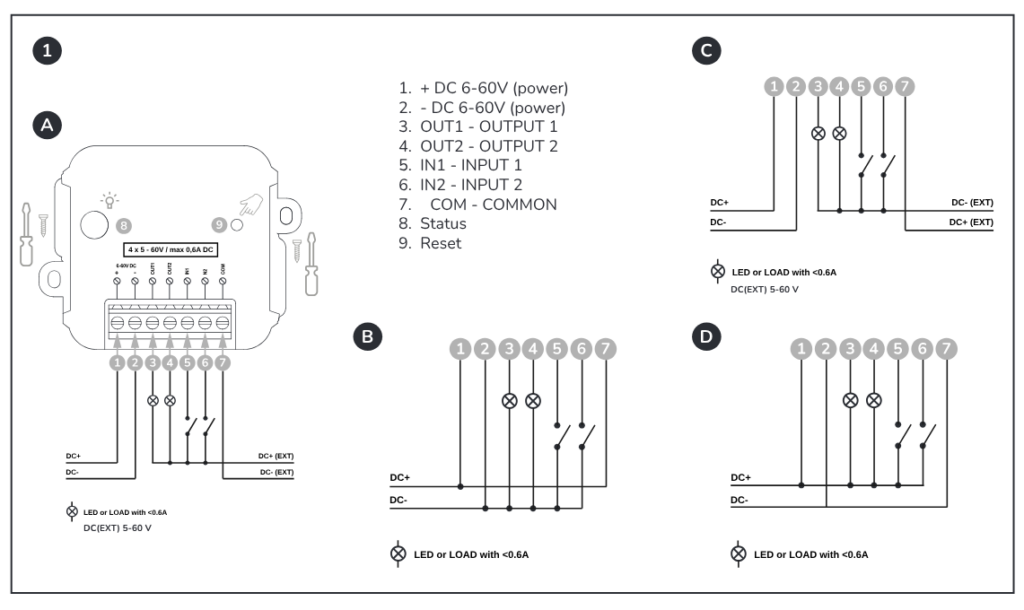
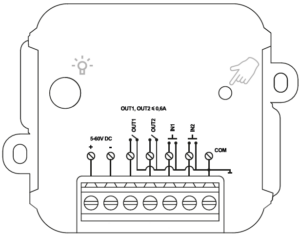
Consult the diagrams provided below, paying particular attention to the designation of the connectors.
Wiring Process
Start by connecting the 6-60V DC voltage power to connectors (1) and (2) as shown in the drawing above, ensuring the correct polarity for the (+) and (-) connectors.
Connect the input and output terminals (3), (4), (5), and (6), always linking them back to the common circuit via the COM (7) connector.
Ensure that the device is connected correctly according to the diagram and that there are no loose metal components, which may accidentally cause a short circuit.
Device Activation
Activate the device by turning on the power, switching on the main fuse, or reconnecting the power cord to the power outlet.
Step 2) Adding Device to the Tedee App
To set up Tedee Dry Contact, you must have a Tedee account with the owner or the administrator access level to the smart lock that will be connected to the dry contact controller.
1) Download the Tedee smartphone app.
Google Play |
App Store |
2) If not already done, install your Tedee PRO or Tedee GO and add it to your account.
3) Launch the Tedee app on your smartphone and log in.
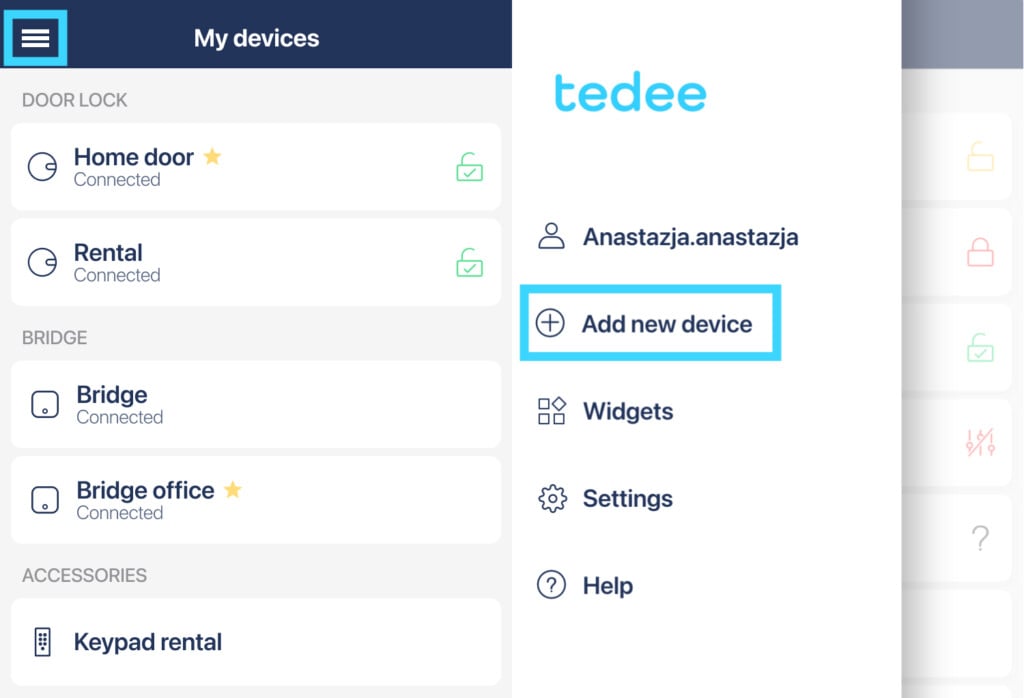
4) From your devices list, access the sidebar menu by pressing the icon in the top-left corner.
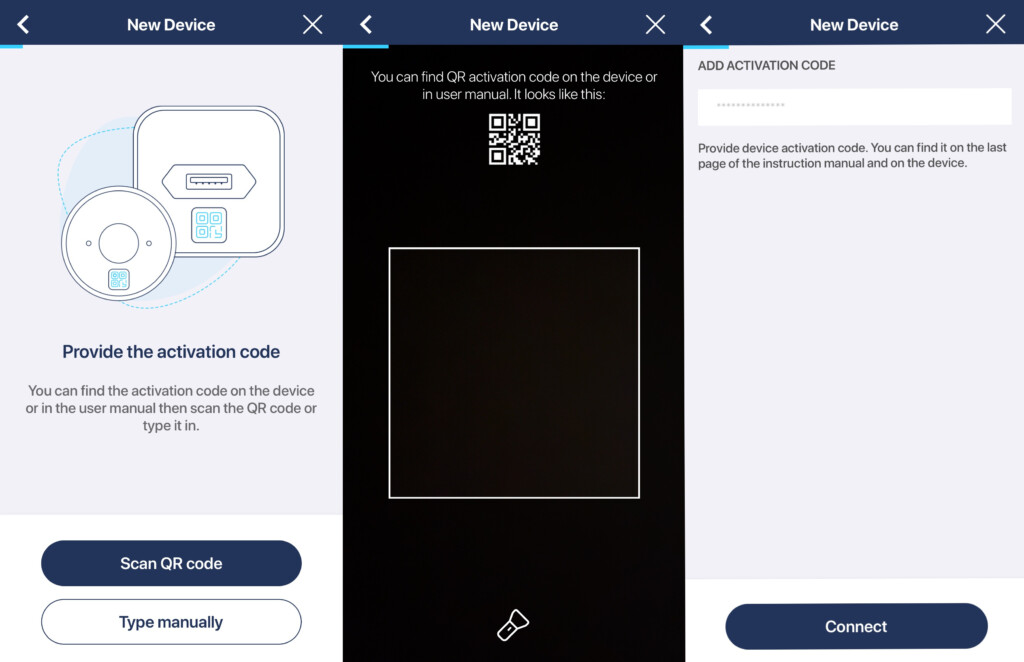
5) Choose “Add new device” and press “Add new device”.
6) Input your Tedee Dry Contact activation code – this is provided as a QR code and in text format within your device’s paper manual, and it is also printed on a sticker on your device.
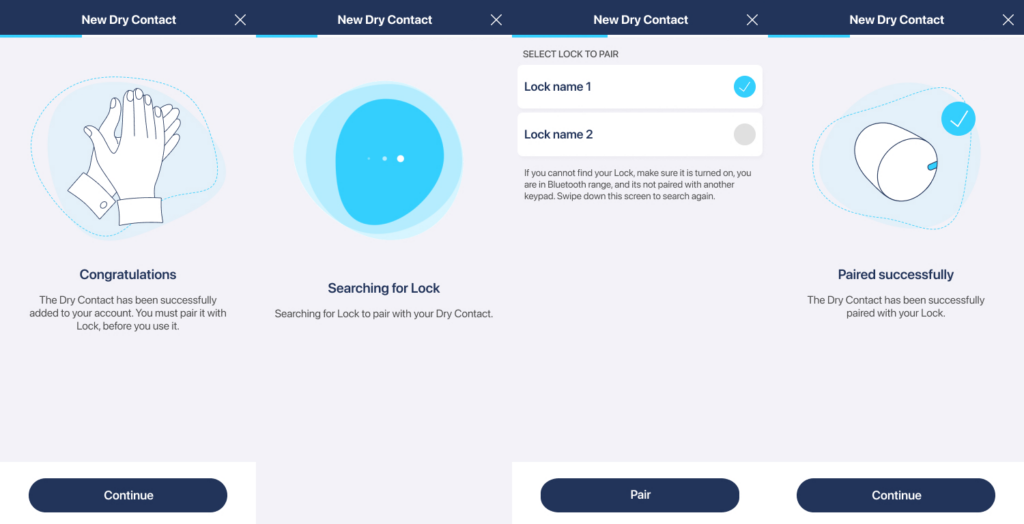
7) Click “Connect.” Your smartphone will add the Tedee Dry Contact to your account. Afterwards, you will proceed to pair the Tedee Dry Contact with your Tedee PRO or Tedee GO smart locks.
8) Press “Continue” to scan for Tedee smart locks within the Bluetooth range of your Tedee Dry Contact.
9) Choose the smart lock to pair with the Tedee Dry Contact, press “Pair,” then “Continue.”
You’re now ready to configure your Tedee Dry Contact and the operations of its inputs and outputs.
Step 3) Device Configuration
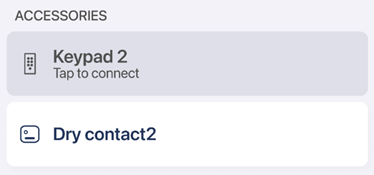
The paired Tedee Dry Contact will be displayed in the list of your devices, under the “Accessories” section.
Tedee Dry Contact does not have a control screen. Selecting the device will lead directly to the device settings.
Signal Configuration
To configure the operation of your dry contact’s logical inputs and outputs, go to the “Signal Configuration” tab in the settings.
You can choose a predefined signal configuration from a range of presets that best suit your installation.
After selecting a preset from the drop-down list, its detailed signal configuration will be displayed
You can also download a preset configuration as a JSON file for manual editing and/or upload your custom preset.
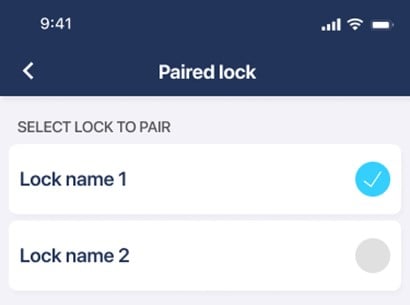
Paired Lock
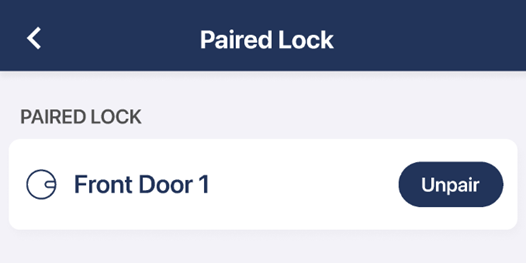
In the device settings, the Tedee Dry Contact can only be unpaired from a connected smart lock if the user has owner or administrator-level access to both devices simultaneously.
If the Tedee Dry Contact is unpaired or not currently paired with any smart lock, this step will display the smart locks connected to your Tedee account. You can then choose a smart lock to pair with the Tedee Dry Contact.
Control Sharing
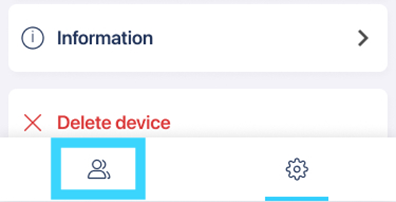
Pressing the left icon in the bottom menu of the Tedee Dry Contact settings opens the access-sharing controls, where the device owner can grant administrator-level access to other users.
Access to the Tedee Dry Contact can only be shared permanently with other administrators; it does not support guest user types or temporary/recurring access.
Be aware that sharing access to the Tedee Dry Contact only grants authorization to browse and edit its settings. Control over a smart lock requires a separate sharing process.
To pair (or unpair) a Tedee Dry Contact with a Tedee smart lock, the user must be an owner or an administrator of both devices.
Guest users of smart locks have no access to any information or configuration of the Tedee Dry Contact.
Factory Reset
A factory reset removes all pairings and configurations of inputs and outputs. After a factory reset, the device must be added to the Tedee account.
To reset the Tedee Dry Contact to factory settings:
1) Press the button of the Tedee Dry Contact.
2) Hold the button until the red LED flashes and then release the button
3) The reset is confirmed by three flashes of the red LED.


