Loxone
How to integrate Tedee with Loxone smart home system
Adding Tedee smart lock to a smart home system based on the Loxone environment requires using API, Personal Access Key, and device ID. Follow the steps below to access the data in the Tedee Portal and connect a smart lock to your smart home hub.
We have created this guide with the help of our friends at Loxone. To learn more about this smart home system, follow to Loxone website here >>
Confirm Tedee smart lock is all up and running with the Tedee app
Before integrating your smart lock into the Loxone setup, ensure you have successfully created a Tedee account, paired your devices with it and calibrated the smart lock.
An Internet-connected Tedee smart bridge is required for integration with Loxone.
Follow the tutorials below for all the steps required:
- Creating the account and using the Tedee app >>
- Pairing devices with the Tedee app >>
- Calibration of the Tedee smart lock >>
Before integrating with Loxone, ensure you can control your smart lock with the Tedee mobile app and via Tedee Portal.
Generate your Personal Access Key in the Tedee Portal
This is the most important integration step, aimed at obtaining a unique, identifying key assigned to your account. This key is not assigned for the lock, but for the account and will allow the Loxone system to contact your account directly.
Now, log in to your Tedee account on the Tedee Portal >>
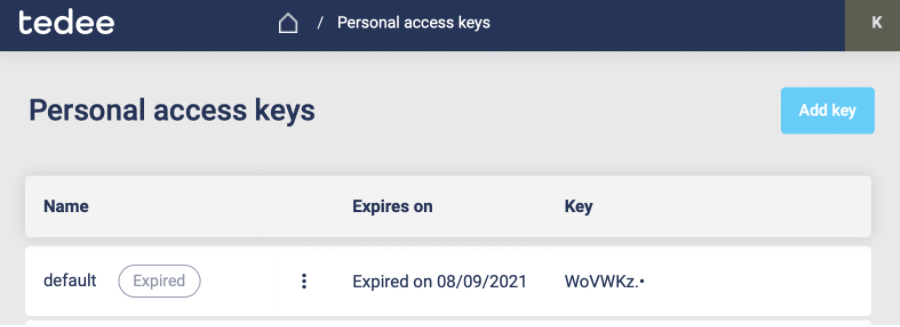
In the upper right corner is an icon containing your initials. Click on it to open a user menu and choose Personal Access Keys.
The portal will direct you to a Personal Access Keys dashboard.
To generate a new access key, click the bright blue Add Key button on the right side of the screen.
Now, enter the name of the key, for example, Loxone.
Choose the validity period, after which you would need to repeat the integration process and renew the Access Key – the maximum time is five years. After this period, you should renew the key.
The last item is to select the permissions that our key will have. For successful Loxone integration, it is necessary to mark the following options: Lock – Operate and Device – Read.
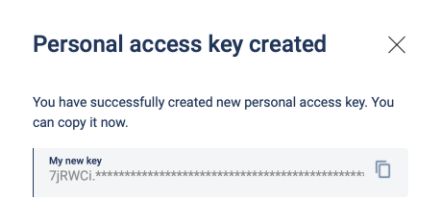
After approval, a window with the created key will appear.
Now, copy the characters into a system notepad or text editor.
After closing this window, this single Personal Access Key will not be available for display again. If you lose this key, it is necessary to generate a new Personal Access Key, following the previous steps.
Get your device ID
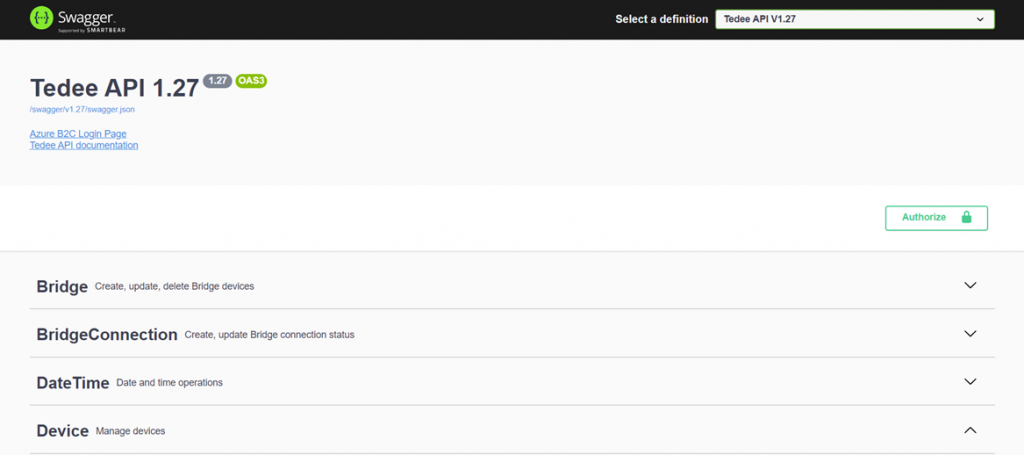
With your Personal Access Key saved, go to the Tedee API website >>
You need to authorize the system and run a unified command to reveal your user ID.
Authorize the system
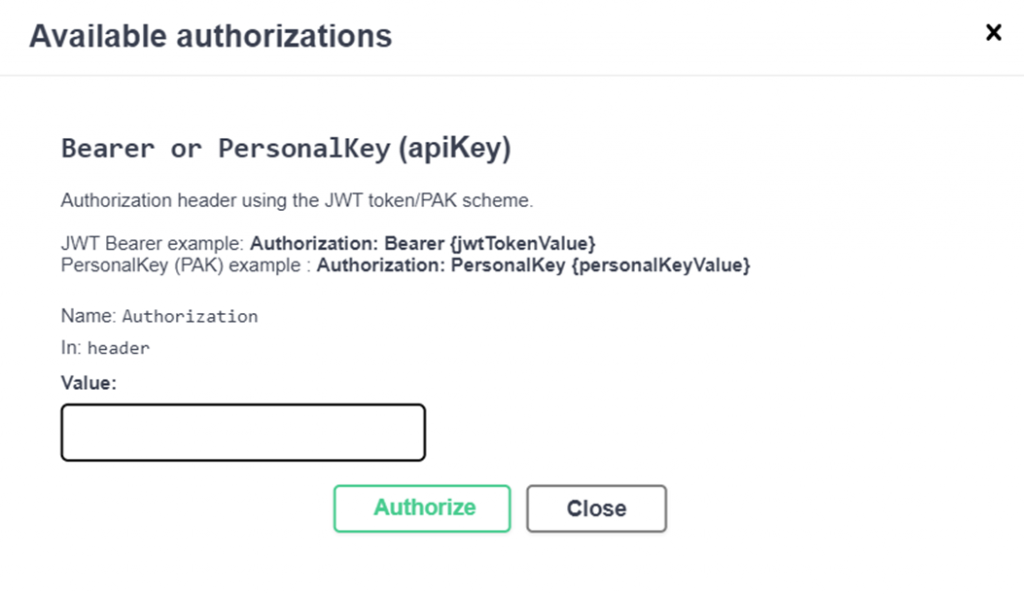
First, click on the green Authorize button on your right. A pop-up window shows up.
In the text field, input the following command, pasting your Personal Access Key, like in the example below:
PersonalKey PASTE_YOUR_PERSONAL_ACCESS_KEY_HERE
Follow by pressing the Authorize button. Afterwards, press Close.
Run the GET command
Now choose the Device – Manage devices menu on the API homepage from the list.
The list of commands will unroll. Choose the first GET command.
Now, press the Try It Out button on your right.
Follow with Execute.
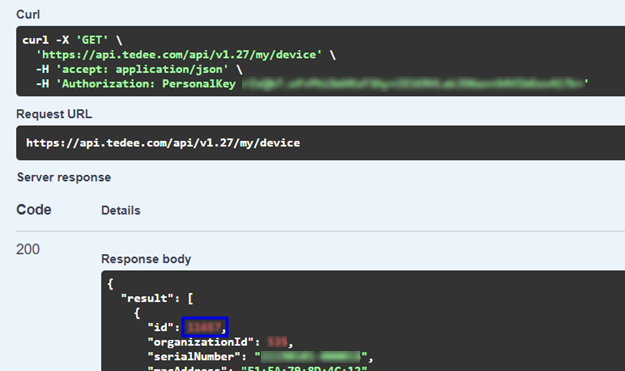
Then, in the black field below, you will find your device ID – highlighted with a blue frame in the image.
Copy the ID to the same text file as before, where you have saved your Personal Access Key.
Add Tedee to Loxone
With your Personal Access Key and device ID, you may follow the steps for adding the virtual outputs and commands, or – if you’re advanced – follow the short manual on the Tedee profile on the Loxone website >>
You may download the virtual output configuration file here >> Remember to replace the pieces of code with your Access Key and ID.
If you prefer a step-by-step guide, follow the steps below.
Add the virtual output
Launch the Loxone Config software on the device of your choice.
In the periphery window, click on virtual outputs and select virtual output connector from the drop-down list ‘Virtual I/O’.
Create a new virtual output, called, e.g. Tedee.
In the address field, input https://api.tedee.com
Now it is time to create the commands: unlocking, locking, and checking the status (which includes its battery level).
Each command must be added separately, using the commands copied from the Tedee API website you have used in previous steps.
Commands are available in the Lock section of the API website.
Locking and unlocking
The command for ON includes http://api.tedee.com/ followed by the commands above, different for each of the three operations.
After pressing Try It Out in the command field and inputting your Device ID, you will see the command in this field – with your device ID inserted.
HTTP Extension for ON in all cases will be the same
accept: application/json\r\nAuthorization: PersonalKey PASTE_YOUR_PERSONAL_ACCESS_KEY_HERE
HTTP Post command for ON must be {}
HTTP Method for ON is POST
Checking the status
Sync with the lock’s current status included both virtual output and input.
Create the virtual output
First, create an output, just as the ones you created for locking/unlocking, using the above command.
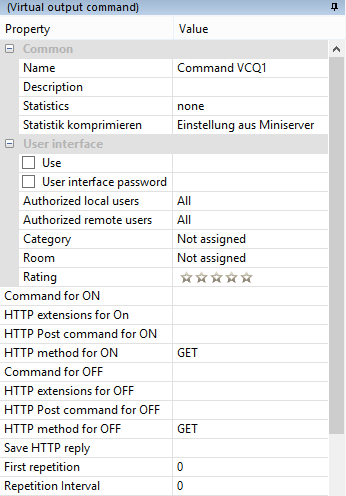
Leave the HTTP Post command for ON empty.
Make sure the HTTP Method for ON is GET.
In the Save HTTP reply field, input the file path where the output will save the lock’s status information.
Create the virtual input
To retrieve the lock status information saved in the file, created by checking its status, create the virtual input, following the classic virtual HTTP input manual available here >>
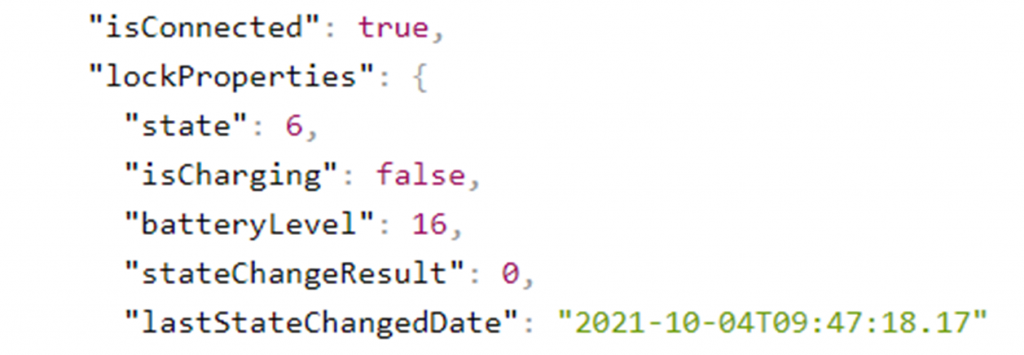
The information received from the lock follows the following scheme:
Now, you need to create virtual commands for accessing every piece of information.
In the Command recognition field, add the value name before the :\v, for example,
Repeat the command for any status information needed.
Now you can use Tedee features by adding function blocks to your setups and integrating a smart lock with Loxone controls and other devices.


