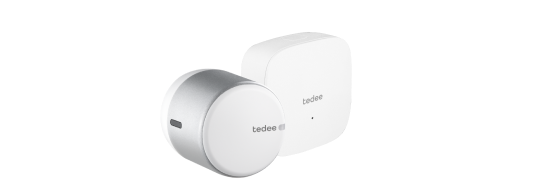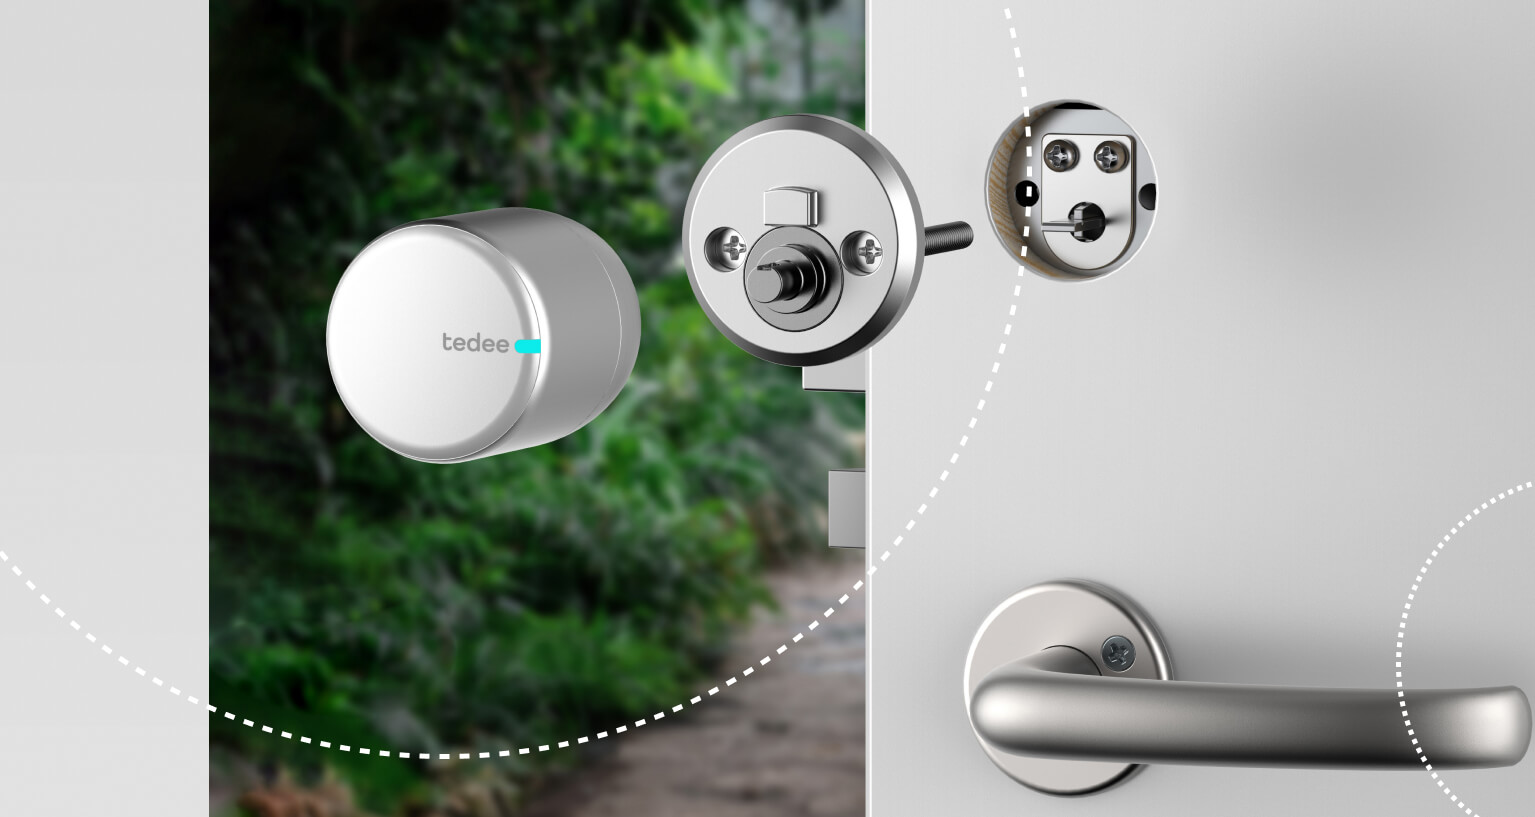
How does a Nordic adapter work?
If your door uses a Nordic profile lock, you can install tedee easily with a smart lock adapter. It’s a quick, do-it-yourself setup that lets you keep existing keys and enjoy smart benefits right away.
The smart lock enables new ways to enter your place and manage access. However, the cutting-edge features are enabled thanks to an efficient connection to your door hardware.
With Nordic-type door locks, it is obtained via a secure installation of a smart lock on a tedee Nordic adapter.
Here you’ll find the overview of the adapter installation.
If the lock on your door is of European type, you can learn about the suitable adapter here >>
What does a Nordic adapter consist of?
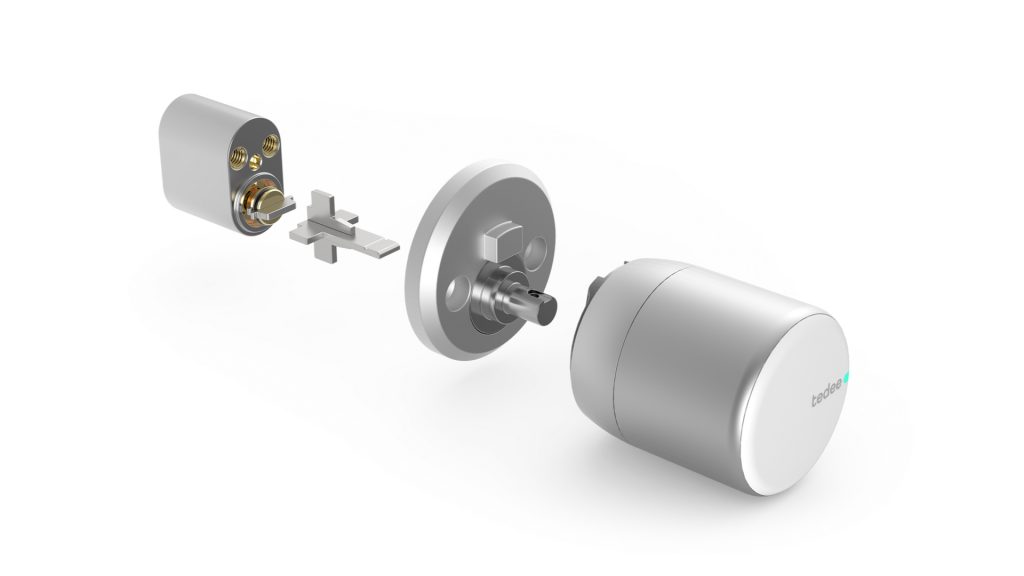
A Nordic adapter is a small piece of metal hardware installed on a door lock in the place of your existing knob escutcheon. It connects to the lock mechanism in the same way but allows installing a smart lock instead of a thumb-turn.
tedee adapter may be enough on its own to install the smart lock. However, it comes with an extra tailpiece and mounting accessories that may be required, according to your setup.
You will need a ruler and Phillips screwdriver, though two sets of pliers may become required in some cases. Allen key required for installation of the smart lock comes in its box.
Can I install tedee with an adapter?
The only requirement of Nordic door locks is the construction of the escutcheon. Inside your home, the rosette around the knob or keyhole must be separate from the handle backplate.
Look at the illustrations below. Notice the difference in shapes around the handle and compare it to your door.
| Compatible | Incompatible |
Though one-piece escutcheons are incompatible with tedee, there may be a simple way to change your setup. Consult with your local locksmith about backplate replacement.
How to install a Nordic adapter?
The video tutorial below presents the installation process, and you can learn more in the five steps below. However, when installing the adapter on your door, follow its user manual >>
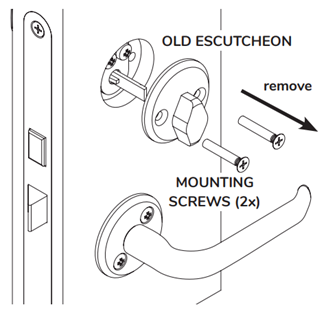
Step 1: Remove existing hardware
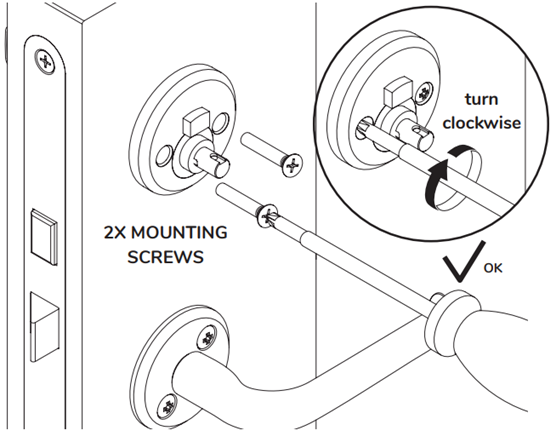
Remove the mounting screws that keep your old knob escutcheon in the door lock.
The lock escutcheon on the outer side of the door is fixed with the screws you just removed. Ensure to prevent it from falling off either with tape or hold it with your hand.
The screws you’re taking off now have the length suitable for your door, so keep them safe for later installation of an adapter. Extra replacement screws are not supplied with it.
Step 2: Measure the tailpiece
After taking the escutcheon off, you will notice a flat, rotating metal tab. It is called a tailpiece, and it connects the thumb turn to the lock mechanism.
Take a ruler and measure how much it sticks out from the door.
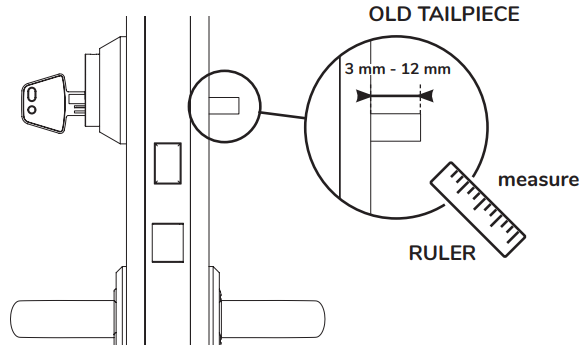
If it’s between 3mm and 12mm, you can proceed directly to Step 4.
If it’s less than 3mm or more than 12 mm, the tailpiece needs replacement or adjustment, described in the next step.
Step 3: Adjust the tailpiece
If your existing tailpiece protrudes for less than 3mm, it needs to be replaced. A new tailpiece with mounting plate and screws is supplied with your Nordic adapter. You can find detailed instructions in the user manual.
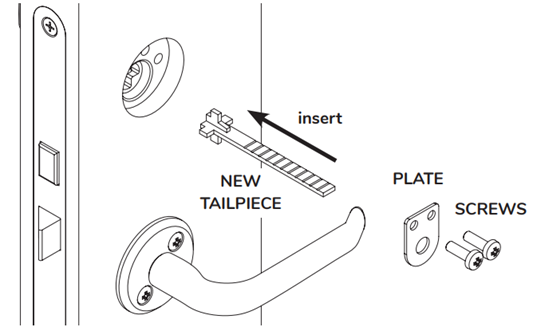
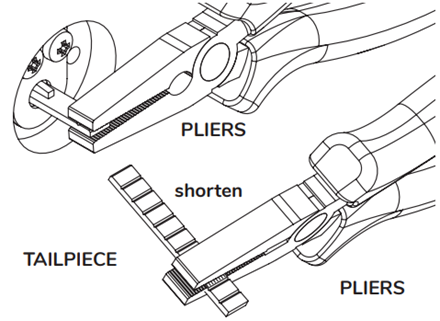
After you replace your tailpiece with a new one, or your existing tailpiece is longer than 12 mm, you need to shorten it.
You need to break the tailpiece using two sets of pliers to do that. You will see pre-drilled grooves – break alongside them, tailoring the final length to protrude from the door between 3 and 12 mm.
Step 4: Install the adapter
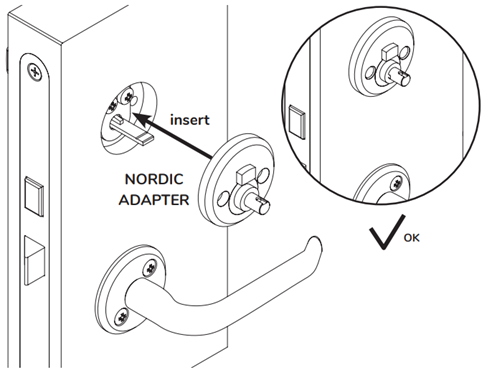
When the tailpiece is of a proper length, you can install the adapter on your door. Ensure that the tailpiece securely fits the mechanism and fix it with the screws you have saved from Step 1.
 |
 |
Step 5: Install the smart lock
Place a smart lock on the adapter. Be mindful of two points requiring a secure fit.
The pre-drilled indentation on the adapter shafts must fit the screw protruding inside the smart lock’s cavity.
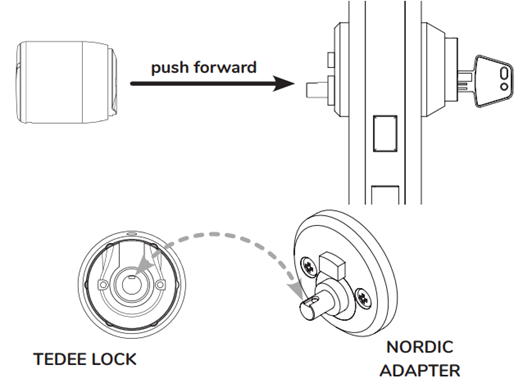
After sliding the screw onto the indentation, match the notch on a smart lock’s plate with the adapter’s lock stabilizer.
Finally, fix the last final screw on a smart lock.
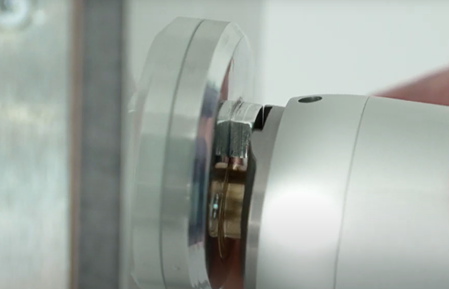
After successfully installing a smart lock with an adapter, you can move forward to pairing your device with the tedee app and calibration.


