


M&C modular cylinder: assembly and replacement
A modular cylinder from M&C allows both smooth compatibilities with Tedee smart lock and SKG*** security standard. Before it works on your door, the cylinder installation includes assembling modules according to your existing hardware. The cylinder’s construction enables customising its length to fit most door locks on the European market. See the video and tutorial below to see how to do it.
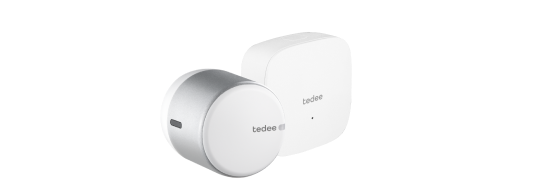
After you order Tedee devices and hardware, you answer a couple of questions that let us choose the right hardware together. You may choose an M&C lock cylinder that provides security attest recognised in numerous countries and property insurance policies. Read the guide here if you are looking for more information on our cylinders or wish to choose one yourself. If you wonder whether to install Tedee with a new cylinder or adapter for the existing lock, read the comparison of both methods in this guide.
Replacing a cylinder for M&C hardware may be divided into preparation, assembly, and installation. Read further for a complete overview, or watch the video below.
Before you start
Measure how much the existing cylinder protrudes

Measure how much the cylinder protrudes from a door or escutcheon inside. This measurement will be useful in adapting the final length of the new cylinder in the next steps.
Remove the cylinder from the door

Unscrew your escutcheon, handle plate or other accessories covering the access to the cylinder. Afterwards, unscrew the screw on the side of the door at the cylinder’s level. Then, insert a key and rotate it slightly to find a position that allows you to slide it out.
See the video instruction here >>
Measure the cylinder

Lay the cylinder flat on a table, staying aware of which side was accessible from inside and outside the property. Notice a screw hole in its centre – this will be the point dividing two measurements.
Take a ruler and measure the length of the cylinder from its ends to the hole’s centre. Repeat on both sides, writing down two measurements for inside and outside parts.
Calculate the final length
You may choose from four lengths on the inside of the property – the side where you will install the smart lock. Available lengths are 30, 35, 40 and 45 millimetres.
If the measurements of your existing cylinders do not reflect these precisely, your new replacement cylinder may be of a different length. How to determine it? Remember the measurement you took: how much your existing cylinder protruded from the door inside?
| Less than 2mm | Between 2 and 7mm | More than 7mm |
| Round the inside length up to the next available size | Choose a new cylinder with an inside length as close to the old one as possible. | Round the inside length down to the smaller size available. |
If your outer length is not reflected precisely, we advise using the closest, smaller length.
Determine the final length of your new cylinder in the table below. You may start by choosing the inside length (on the right column) according to the guidelines above, then choosing the closest available outside length from the left column. Write your values down for assembly in the next step.
| Outside
available key side lengths |
Inside
available tedee side lengths |
| 32mm
37mm 42mm 47mm |
30mm |
| 32mm
37mm 42mm 47mm |
35mm |
| 32mm
37mm |
40mm |
| 32mm
37mm |
45mm |
Assembly
Assembling your final version of the M&C cylinder consists of three parts. Taking it apart, choosing modules, and securing the final setup.
Preparation
Pieces are secured using two kinds of screws, with matching Allen keys attached in the box. In your cylinder box, you will find five kinds of modules.
| Tedee side module | Distance modules | Cam module | Key side module |
 |
 |
 |
 |
|
Base shafts in two lengths |
|||

|
|||

Composing the cylinder
Get back to the desired cylinder length determined in the previous steps.
Default measurements of an M&C cylinder with no additional modules are 32 – 30mm. If this is your suitable final measurement, move further down the guide for securing advice.
If not, take the cylinder apart and choose modules for your final measurement. Choose your desired measurement and check which modules to add. In the last column, you will find which shaft to use. The easiest way to distinguish them is by comparing their lengths – one is longer than the other.
The table will give you a complete recipe for assembling the modules and shafts to secure them in place in the next step.
| Modules to add to the key side | Desired key length | Desired Tedee length | Modules to add to the Tedee side | Shaft to use |
| none | 32 | 30 | none | Shorter |
| 35 | 1 x 5mm | Shorter | ||
| 40 | 1 x 10mm | Shorter | ||
| 45 | 1 x 10mm + 1 x 5mm | Shorter | ||
| 1 x 5mm | 37 | 30 | none | Longer |
| 35 | 1 x 5mm | Longer | ||
| 40 | 1 x 10mm | Longer | ||
| 45 | 1 x 10mm + 1 x 5mm | Longer | ||
| 1 x 10mm | 42 | 30 | none | Shorter |
| 35 | 1 x 5mm | Shorter | ||
| 1 x 10mm + 1 x 5mm | 47 | 30 | none | Longer |
| 35 | 1 x 5mm | Longer |
Securing the modules
On the smart lock side of a cylinder, in the section where the shaft goes, you may see four screw holes:

The shaft is always secured with two screws. Hence, according to various modules and shafts, you will use different combinations of two holes.
Using longer modules will either use longer shafts, different pairs of screw holes, or both. Compare setups below.
 |
 |

Secure the shaft on the key side with one larger screw on the bottom, and a single pin, inserted in the hole on the side. You may need to use a hammer for that.
Now your cylinder is ready for installation on the door.
Cylinder installation
With a key inserted, slide the cylinder into the lock with a Tedee knob inside.

Secure the cylinder to the lock with a screw on the side.

Afterwards, install your escutcheon, handle or backplate.
With a cylinder on your door, you can now move to install a smart lock and then its calibration.


